English style knitting, which is the most common knitting style in the US, is only one style of knitting. To knit in the English style, you hold your yarn in your right hand, unlike Continental knitting where the yarn is held in your left hand. So, the first thing you need to learn to do when knitting is how to knit and purl in the English Style knitting. This is really quite simple once you’ve done it once or twice.
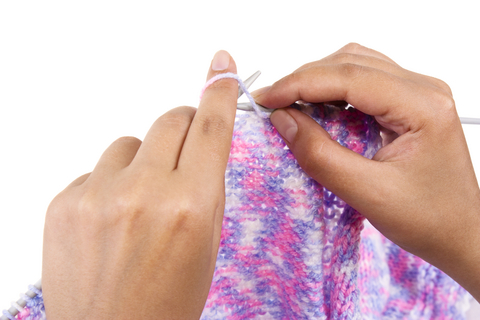
How to Knit in the English Style
A knit stitch is the most standard stitch in knitting, which is why it is named the knit stitch. This is the stitch that makes the “v” on knit fabric that is so recognizable. In order to create a knit stitch in the English style, you first need to cast on the number of stitches you need for your row. From there, you insert the tip of the right needle into the first stitch on your left needle from left to right, and front to back. Then, with your right hand, you bring the yarn in front of your right needle, going counterclockwise around the needle. Once you have the yarn in front of the needle, you pull the tip of the right needle along with the yarn through the old stitch so that it is in front of the left needle. Then all you have to do is slip the old stitch off the left needle, and you’ve got a new knit stitch!
How to Purl in the English Style
A purl stitch is basically a backward knit stitch. It is visibly backwards in that you see a bump on the right side and a “v” on the right side, and you also make a purl stitch the opposite of a knit stitch.
To create a purl stitch in the English style knitting, you hold the needle with your existing stitches in the left hand, and insert the tip of the right needle into the first stitch from right to left and back to front. Using your right hand, you’ll then wrap the yarn around the back of your right needle counterclockwise and then push the tip of the right needle and loop back through the old stitch so that your right needle is behind the left needle. Then you just need to slide the old stitch off your needle and you’re done! Like I said, you create the purl stitch the exact opposite of a knit stitch.
How to Make Stockinette Fabric
Now that you know how to knit and purl in English style, you have all the tools you need to perform a stockinette stitch fabric. Stockinette stitch fabric is the classic knit look, where it lays flat with all of the “v’s” lined up on one side of the fabric, creating a soft, smooth, and very elastic garment.

In order to create stockinette fabric in knitting, you first knit one entire row of stitches, and then purl the next row. You continue in this pattern until the project is completed and you’ll see your rows of “v’s” which should be nice and even and all on the right side of the fabric. On the other side of the fabric, the wrong side, you’ll see off of the bumps hidden from view.
Stockinette stitched fabric is the most popular fabric used in knitting due to it’s elasticity, flexibility, and weight. However, stockinette fabric will not lay flat unless you create some sort of border around it. That border can be anything you like, but the most popular borders are a few rows of ribbing, where you knit two, then purl two, or garter stitch, which is just several rows of knit stitches.
Knitting is really knowing two main stitches and combining them in a visually pleasing way. The knit stitch and the purl stitch are the two most important stitches that you’ll learn when you first start knitting, so practice them well and you’ll be on your way to making any project you can dream up. Once you know how to knit and purl in the English style, you know everything you need to create your first knit project.